keskiviikko 1. helmikuuta 2012

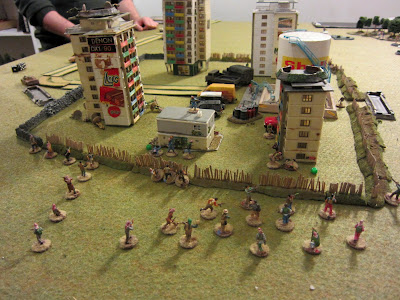
Battle of Burgos

It has been a long while since we played napoleonics the last time and it probably has something to do with our 1808 Russo-Swedish War project too. Like battle weariness coupled with the fact that not everyone in the club is into the period...

Aksu had bought Too Fat Lardies' Le Feu Sacre III -rules and painted some 15mm Spaniards so he wanted to give both a try so he put together a scenario for the Battle of Burgos. There was no doubt about the outcome, the Spaniards were going to get their heinies kicked. Hard. No probs there though -the battles definitely don't have to be fair and even to be enjoyable. Quite the opposite.

Spaniards deployed for the battle. Since the actual commander had fleen the forces were commanded by a count, or some other noble, who had no military experience at all. On the right side of the road you have crap de la crap, Spanish militia which is a bad troops as can be. On the left side of the road are Spanish guards supported by regular infantry -these are more or less the quality of regular Frenchies. On both sides of river there's a regiment of not-so-trained light cavalry. Excelente!

Froggies arrive using blinds. Took them a couple of turns to get this far from the board edge -these brigade blinds are supposed to quicken the play as you don't have to fuss with fiddling of the miniatures. Spaniards could also have been deployed like vise but we kinda forgot that...

Blinds can be spotted by enemy commanders but they are notoriously bad at this -units in the open within artillery range are probably not going to be recognized so you can't even tell whether the blind is actually a dummy without any troops or it if contains cavalry, infantry or both. Fog of war and all that. Hrmph!

Trying to avoid the historical events by deploying the militia into squares...

...which wasn't in vein as the blind on French left flank contained three regiments of medium cavalry. Luckily the Spaniard light cavalry is absolutely inferior to them but now also heavily outnumbered. Fleeing seems like the most valid option, but unfortunately they have hold-orders so they are waiting for a sound trashing.

Fearing the couple stands of Spanish artillery (the only unit type eligible to shoot in LFSIII) the French infantry deploys in the forest.

Surprise of the surprises! Against supported attack by French dragoons led by their commander the Spanish cavalry manage to get a result where they both combatants retreat a bit without casualties. Ay ay ay! Muchos cohones!

Infantry vise the Spanish artillery manages to score, against all odds, a couple of hits to some of the numerous French battalions, but nothing that has any effect on the game. The Frenchies advance out of the forest and especially against the unlucky militias in squares.

Caramba! Francés de infantería.

While the three French cavalry regiments drive off the hapless Spanish cavalry, the French infantry gives a good ol' whupping to one square making it flee and, as the militia is brittle, the remainder join in. The last remaining French blind contains two more regiments of dragoons -things are looking might grim for our heroes!

The remaining French infantry also start closing in on the better quality Spanish troops. Ah, and the Spanish artillery (previous in the middle of the formation, now suddenly in the right flank) is forced to flee by flanking attacks.

The militia is rallied for a while, but new attacks send them running for the hills again. The other Spanish units are now also engaged and thus pinned.

The most beaten militia is allowed to flee while the others are rallied.
Elsewhere the Spanish guard is routed by flanking attacks.

One dragoon unit routs three battalions by flanking attack and the subsequent breakthroughs leaving one Spanish battalion to defend the field in addition to one cavalry regiment on the left flank on the other side of the river. The Spaniards are soundly beaten -a historical result even if our guard units didn't get to put up a proper resistance.


The system uses unit cards to see which brigade is acting. Each commander also rolls initiative point dice -being in the opposite ends of spectrum French had a positive modifier for this while the unlucky Spaniards a negative one. Quite often the card system meant double actions for one side as they got their card last from one deck and then first from the next turn's deck -never that good a thing for a game.

Combat resolution and results seemed a bit foggy and cumbersome. Had plenty of fleeing/routing and surprisingly little damage. Undecided if this is actually a good or a bad thing.

Some interesting concepts in the rules that look promising when you read the rules but most of them didn't really seem to work all that well in practice. The one I thought was the best was one that made the rallied units permanently shaken -no more infinite rallies with no adverse effect on the morale! British style of rule writing (sloppy or non-existing editing) don't really help using the rules.

The rules are supposed to be quick play rules but even if you take into account all the problems involved in the first game I thought that the rules were pretty darn slow.

Dunno if it was because of the lack of shooting but the worst part of the game was that it lacked the period feel. I think that in that aspect the game was probably the worst nappy game I've ever played and that also includes the few games of Piquet we played years ago. At least with Piquet the game flow was much better. Actually this experience was not that unlike other set of Lardies rules, TWaT, we tried out last fall -seemingly simple and sound in theory, but throughly rotten experience as a game.


Based on the experience from this game (and I don't mind losing, mind you, the Spanish defeat was a certainty from the first moment) the hype from the publisher seems like as inaccurate as can be:
"The result is a set of rules that is fast and enjoyable to play, but also captures to true feel of the period."

YMMV, butI think I'd rather have my teeth pulled than play with these rules again... :(


Wikipedia entry of the battle

Janne
(Played: Jan 30th. GM: Aksu. French: Chris, Mr V. Spain: Aksu, Janne.)

torstai 26. tammikuuta 2012

The Battle of Logan's Cross Roads


Confederate probing attack with all kinds of disadvantages:
-Overall commander who was drunk as a skunk during the battle
-Nearsighted brigade commander destined to die
-Almost all troops are as green as they come and armed with antique flintlocks to boot.

Overview of the battlefield from the Union's side.

The initial setup -Union pickets are beset with the Confederate horde.

Chaaaarge!

Union pickets start withdrawing as well as reinforcement battalion arrives at the ravine.

The pickets have withdrawn behind the second fence.

The other Union picket unit, Cavalry, gets annihilated in close combat and Crittenden starts to arrive with the Confederate main force.

Marching towards Washington!

Union reinforcements.

On the Confederate side only the Mississippi boys have guns that have any range.

Rebel trafic jam in making. Also, Zolicoffer gets killed.

Some not so spirited shooting.

Union reinforcements get closer. Those 2 batteries don't promise anything good for the rebels.

Confederates slowly organize their troops.

It is better not to shoot at enemy infantry at you when they are providing a meat wall against numerous enemy artillery...

Green troops on the receiving end of couple batteries is likely to result in a rout. Other units scramble to get off the open to avoid being bombarded to pieces. Confederate guns are finally in position too.

Flee! They're are shooting human beans ovah there!

Artillery duel. Some additional Union reinforcements arrive.

Pound 'em into oblivion boys!

Union dilemma: how to get past the batteries?
BTW I have no idea why this picture is totally of different color range...

The Confederates gain control of the Mill Springs Road.

Here starts the lesson of not tarrying in the road column on the battlefield.

Plenty of fire but to little effect.

Advancing in heavy woods in quite slow. Even more Union reinforcements arrive.

The Mississippi boys keep on taking the beating...

...so the Tennessee rookies need to bail them out by charging and driving away the enemy.

More Union reinforcements advance.

The Union troops didn't stay away for long though...

Firefight ensues on the other flank as well as the battalions battle it out in the orchard.

Confederates start taking positions on the edge of the wood -too bad their flintlocks have abysmally poor range.

Although it seemed to control it in the beginning the Confederate artillery lost the duel and retreated to the cover of the forest to secure the right flank with the Cavalry.

Lines are clearly forming on the left flank.


Unfortunately we had to end the game at this point since it was getting late.
Chris was going to play the last remaining rounds as a solo game to see how it went.
The confederate players informed Chris that since they are outgunned and outranged the only way they'll be able to win is by getting into close combat.


Here's his report:
Thanks! I hope everyone had fun with a very confusing and sprawling game. Strangely enough, I had thought it would get congested around the clear "lane" in the middle of the table, and instead the forces scattered to the wooded flanks! Is the artillery that powerful? Hmm ... I guess if you have flintlocks, yes, but they seem awfully easy to silence.

At any rate, I did finish out the final few turns. And ... how much detail do you want? In the northern woods, the Confederates retired out of close range and the Union troops realized that if they advanced they would get hit by the CSA guns in the field, so they held tight waiting for reinforcements ... which rolled Tardy every turn. So, no real action there.

In the main action to the south, the CSA launched its assault on turn 10, but a critical rally/retreat result on the middle regiment messed up the support waves, the far flanking units weren't able to move up in time, and the Union checked one of the two charges (both by the Trained units) with fire. The other charge started at CSA +1 and Union +0, and the CSA won by 2 and pushed the Union regiment back 2". During Union turn 10, a whole brigade piled into the CSA regiment in the salient, and pushed it back out of close range. Everybody was disordered, but the Union line looked pretty strong.

On the CSA turn 11, the CSA regiment at the rear table edge finally routed off the table, which brought the CSA to Heavy Casualties and Greater Casualties ... ouch (but they don't apply until next turn). The CSA managed to rally everyone in the south and launch another supported charge across the open field, but it was checked by withering fire. The CSA did manage to disorder the entire Union line again, but it was looking gloomy for the South. In the Union turn 11, the northern part of their line had to retreat out of close range - but even this was bad for the CSA, as they had to retreat out of enemy musket range but had rifles themselves to reply with. The rest of Union line rallied and kept up the fire on the CSA line, hoping for bad morale results next turn.

On CSA turn 12, the main CSA brigade in the south broke (all it took was rolling a 4). Four of the five regiments broke, and the fifth retired into the woods. The other pair of units from Zollicoffer's old brigade rallied, and established a sort of rearguard line. That pretty much ended the game as I saw it, but despite being driven back the CSA still held the Cumberland Pike at game's end.

So, the final results were: Union 2 (inflicting heavy casualties and greater casualties), CSA 1 (key position). It was a marginal victory for the Union, but all in all the CSA did pretty well with the vast limitations of their forces.


Wikipedia entry of the battle

Janne
(Played: Jan 23rd at Chateu d'Tenwolde. GM: Chris. Confederates: Janne, Mr V. Union: Aksu, Chris.)
lauantai 21. tammikuuta 2012

Libya 2011


Janne N devised us a rather topical Force on Force scenario.

There's some Libyan regulars who are emptying secret base number 45 (originally built for manufacture and storage of chemical weapons) from the gold that has been hidden in it. Leading this operation is a cousin of Gaddafi. They want to escape with their lives and as much gold as possible.

Numerous irregular Libyan freedom fighters have arrived in the vicinity and capture the gold and the cousin of the hated former leader.

Few British SAS troops are here to capture the chemical weapons in the base. And give the rebels support.

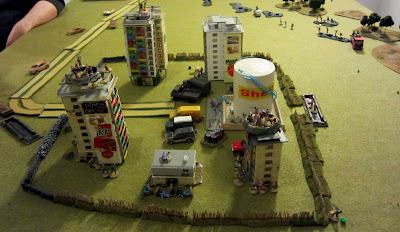
Overview of the base with rebels surrounding it from two sides.

The local sheep farmer is about to get the surprise of a lifetime!

Couple of squads of rebels manage to reach the fence but are slaughtered there almost to a man (from the leftmost one manages to survive. This guy, Ali, picks up a machine gun from a fallen comrade and later on... it is payback time.

After the positions on top of the houses have been silenced the remainder rebs on this flan surge towards the compound and the poor SAS sods, dressed in civvies, have no choice but to follow them.
The rebs occupy the positions now, as well as hold the enemy leader as prisoner on the leftmost building. But there's still plenty of stiff resistance from the remaining regulars. The other reb flank also starts to advance towards the compound.

The fire from the regulars sweeps the rebs from their positions on the left building. Ali has moved to the low middle building.

Enemy prisoners in the process of being moved away from the combat area.

Both reb technicals in action -they are rather fragile...

All the regulars have been shot to pieces.


Resultwise, everyone went into negative points, but the Brits least (their commanding officer was their only casualty) so they won.
Rebs were almost killed to the last man and none their leaders survived so they weren't able to get the gold as the rank & rile hardly knew about it. And besides there were too few of them to try to get it from the Brits after they noticed that the barrels contained something else than chemical weapons. At least they managed to capture the Gaddafi's relative alive.

Janne
(Played: Jan 16th. GM: Janne N. Libyan Army: Aksu, Mr V. Libyan rebels: Eero, Janne L. British SAS: Mr H.)