sunnuntai 9. joulukuuta 2012

Force on Force -Germany 1984

Tried some FoF in Europe.

Two Soviet squads enter the table on BTRS.

You want to dismount quickly in order to avoid being blown up while in the APC.

Still no jerries in sight.

Janne L (Played: May 7th. GM: Aksu Jerries: Aksu and Eero (&perhaps even Mr H.). Sovs: Janne, Mr V.)

sunnuntai 1. huhtikuuta 2012

Force on Force -Falklands

We played our first scenarios of the Falklands War and both were from the invasion. they were also kinda linked. The Brit had some two squads which were to be divided between the barracks at Moody Brook, the observation post in the coast and a patrol roaming the countryside.

Because of the wonders of modern technology we are able to present to you both clearly discernible pictures of the events as well as pictures of how the actual troops perceived what was going on.


In the cover of night an Argie force is creeping towards the barracks at Moody Brook. besides a MG team on guard duty, all the Brits are sleeping. Operating at night is mighty difficult since every time you want to fire when the enemy is not withing half effective rage, you got to spot the target first -no spotting means no fire.


Two thirds of the Argie force was special forces ninjas that couldn't be spotted at all when outside half effective range and when they were closer you had to roll to spot. What a coincidence that they also carried suppressed SMGs which were, erm, rather effective at close quarters.


Brits managed to wound like two or three Argies, but after surrendering only one Brit was unscathed and two lightly wounded. Two or three were dead and the rest were heavily wounded. The Argies had orders to use minimum force so the operation went kinda south in that regard...


In next scenario a small Argie force consisting of two small squads and a MG section was to capture a British observation post. The Argies deployed the MG section in the hilly area to give covering fire and closed in. Pretty soon the small British patrol also entered table ad it took quite a while for the Argies to shoot them down.


After which they had little options but to engage fully in order to capture the OP before dawn. The OP managed to beat down the Argentinian sqaad that entered melee and even captured a prisoner while the sun rose (on that part of the Empire...)


The night rules were OK, but the stealth rules for the "ninjas" seemed excessive.

Janne L
(Played: Mar 26th. GM: Janne N. Argies: Aksu, Mr H. Brits: Janne, Mr V.)

First Battle of Lexington

This was a pretty straightforward siege affair where roughly the twice as large Confederate force attacks an Union fortified position. Since we had two newbies with us, non-club members but gentlemen nonetheless I might add, this rather straightforward scenario seemed a relatively good way of showing them the ropes.


Following initial clashes between the Confederate Missouri State Guard and local Union forces at Boonville and Carthage (both of which we played last Spring), the overly aggressive Union attack at Wilson's Creek (which we will somewhat paradoxically be playing in two weeks) resulted in a bloody repulse for the Federal troops. As the Northern army withdrew and regrouped, the Confederates swept forward throughout the territory in an attempt to take advantage of their victory. However, they found themselves held up by the garrison of Lexington, which had dug in around the local Seminary College and were prepared to await relief. After waiting some time for lack of supplies to weaken the Union forces, and then blocking the first serious relief effort by Northern troops, General Price finally ordered his Missouri State Guard forward to the attack.

This scenario pits the surrounding Confederate forces against the besieged Union forces, as the Missouri State Guard attempts to storm and capture the Northern stronghold. The Confederate forces are composed of the still poorly armed but numerous and somewhat more confident Missouri Sate Guard. Union forces are a mixed bag of well motivated regular troops and local militia that had begun to consider surrender the better option.

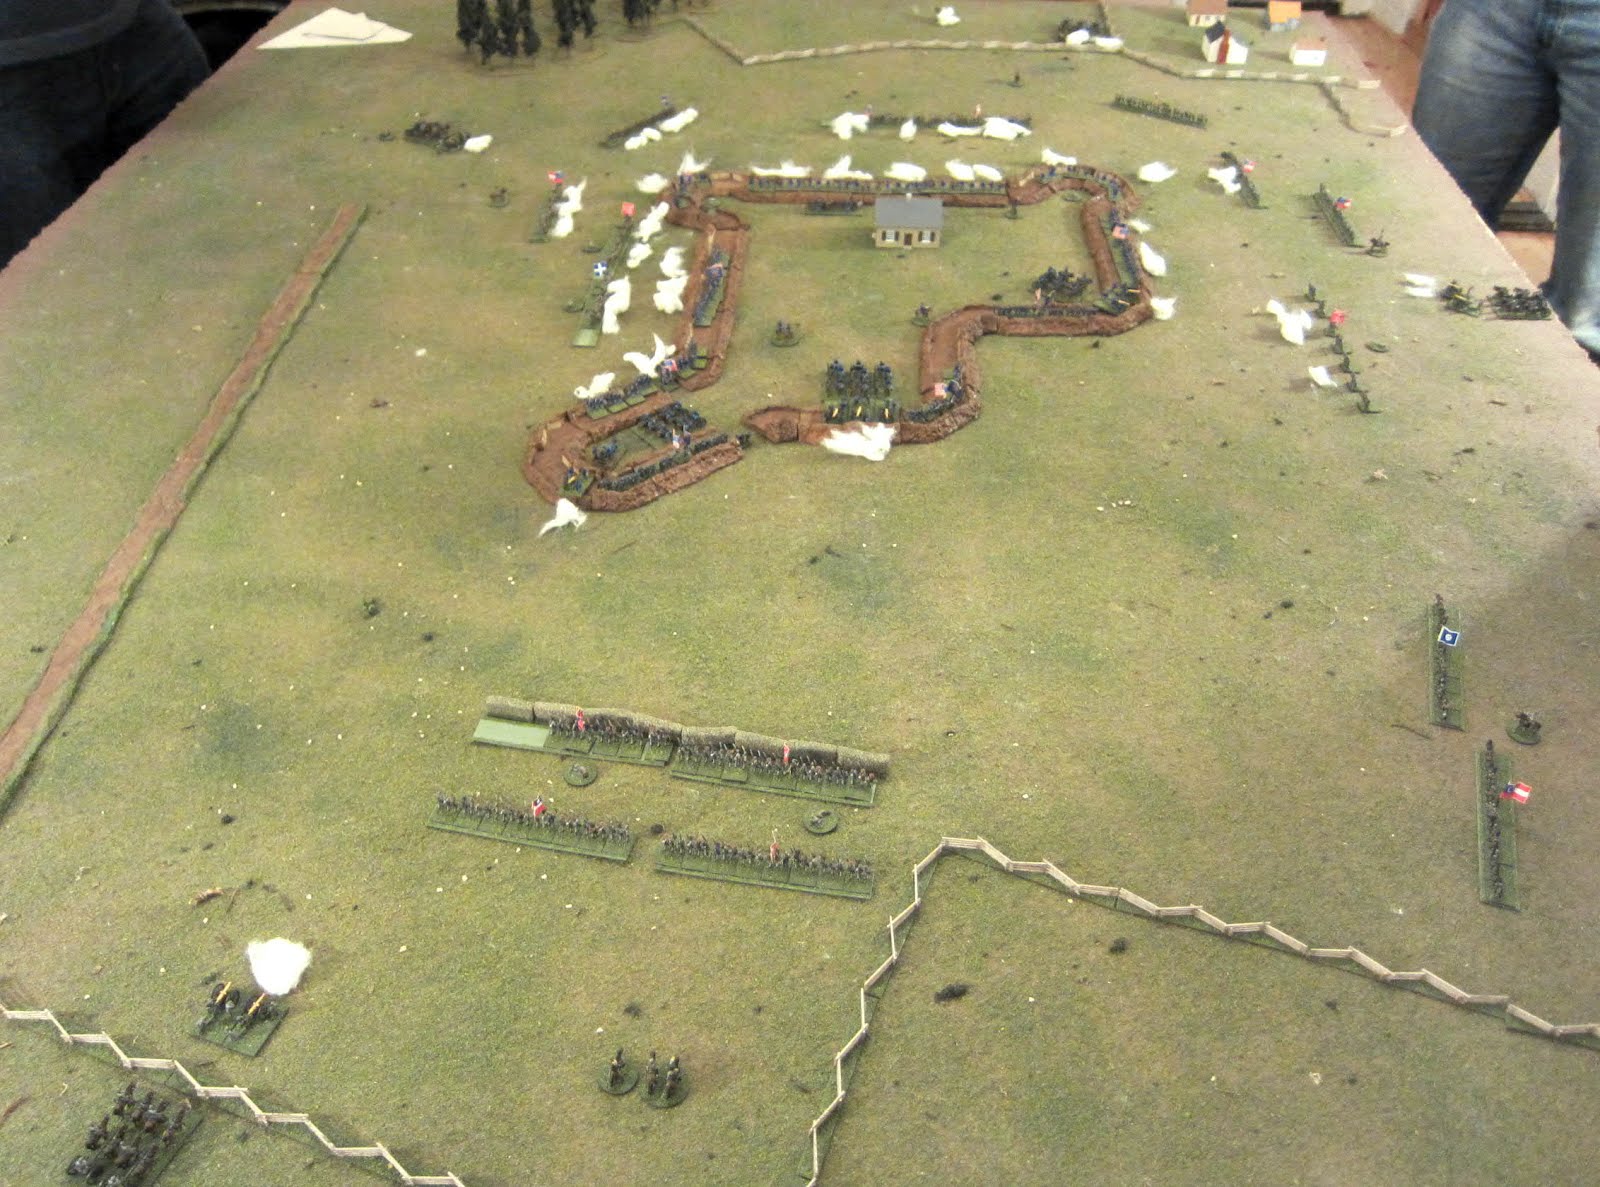
The works are Rough Terrain for movement, Full Cover (-2) versus fire, and Favorable Ground (+1) in close combat. The Seminary itself, in the middle of the works, is a Fortified Position (-3 versus fire) and a Strong Position (+2) in close combat - it can be garrisoned by up to 10 stands of infantry. While a strong position, note that any Union unit which is forced to Retreat from the works is considered Broken and Surrendered instead ... all stands are lost!

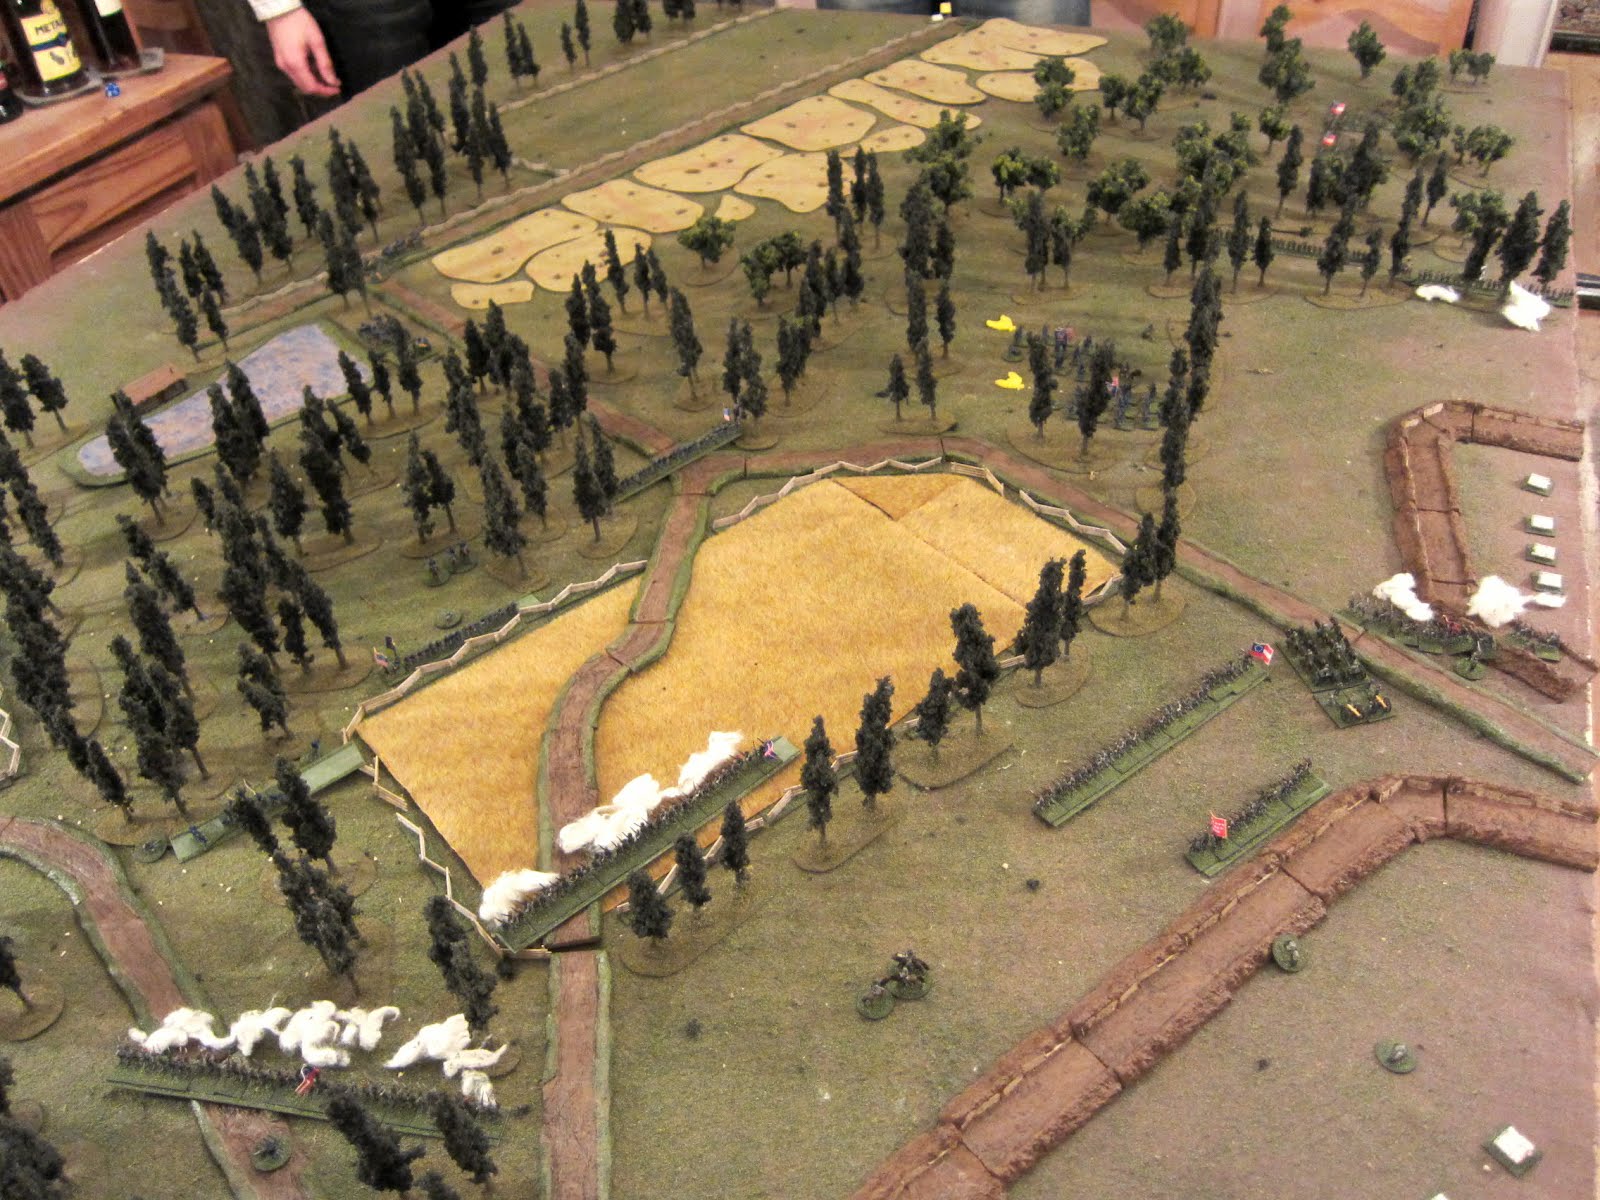
The woods in the northeast corner are Light (Broken Ground, -1 versus fire, +1 in close combat); the Lexington Suburbs in the southeast corner are treated the same. The "Anderson" mansion and warehouse to the west only affect movement as Broken Ground. The "ravines" (sunken roads) to the northwest and southwest are Broken Ground for movement - a unit may choose to "lie down" in the ravines and will be out of LOS of the Union defenders, but will require a formation change to reform.

The Confederates have come up with an ingenious plan to use the local stock of hemp bales as a sort of mobile bulwark serve as cover during their advance - resulting in the battle being known as "The Battle of the Hay Bales". There is a frontage of 240mm (8x 30mm pieces) of these hay bales available - this is conveniently equal to the frontage of two Confederate units in line. The hay bales may be moved forward using the Rough Ground movement rate. While moving, they provide a -2 modifier versus fire; if immobile, they provide a -3 modifier ... reports credit the hay bales as stopping Union artillery fire! The hay bales count as Broken Ground to move over, and provide a +1 advantage to a defender in close combat if charged, but are destroyed if occupied by enemy forces. The hay bales are initially deployed with McBride's command, covering the two regiments in front of the Anderson Warehouse.


Overview from the East.
Most of the Units move immediately to really close quarters. That is except the troops pushing the bales which didn't provide any shelter against the howizers which, combined with regular arty, wrecked havoc on the troops slowly pushing the bales forward. Thus the only thing the bales did was to slow the units behind them down so they got get fired upon more than without them -quite a change from what apparently happened in reality (most of the confederates closing in behind the bales...)
Much bloodier affair that it was in reality.
Confederates on the ramparts! Breaching enemy fortifications sure seems pretty easy in this ruleset!
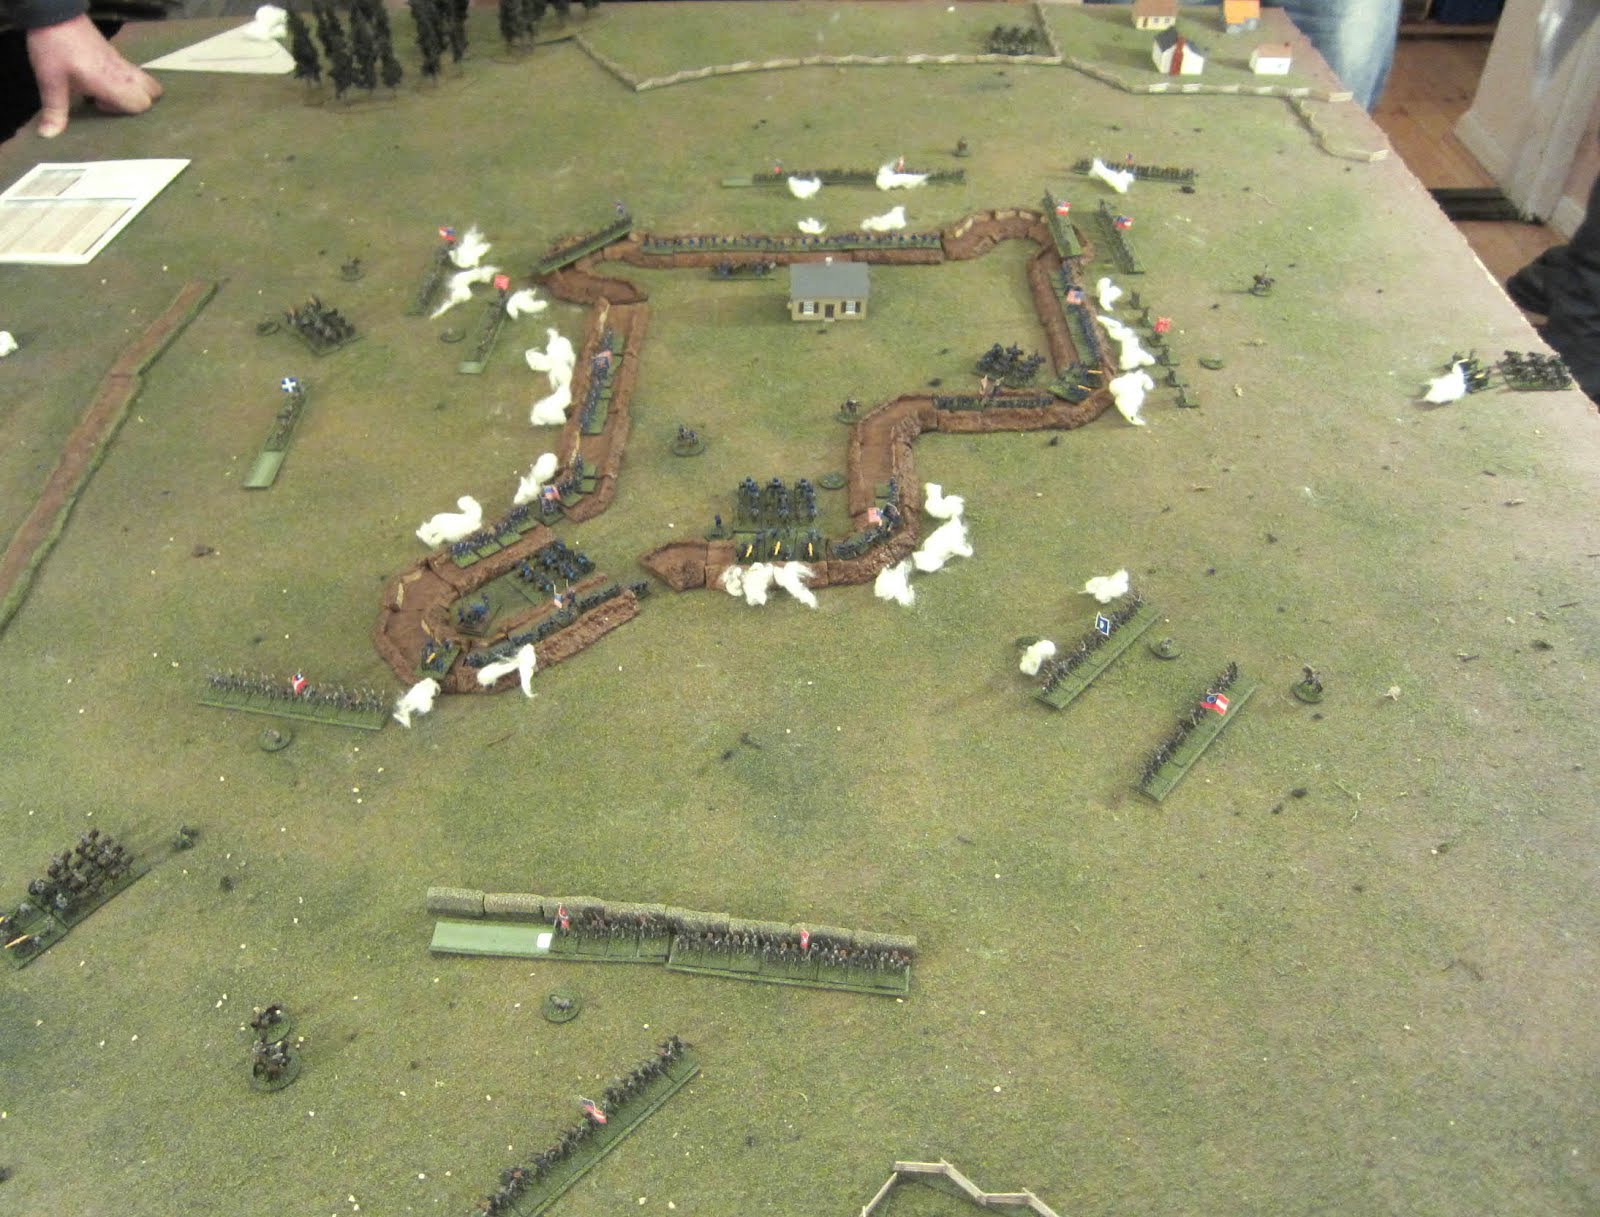
A wider view of the same.
Marshall's cavalry retreats to the Seminary.
Despite casualties Confederate troops in the west try to tie as many Union troops as possible into shooting them and not supporting the troops defending against the breaches.
A closeup of the same.
Confederates storm the southeastern salient.
Meatgrinder in the process.
The Confederate troops on the west have had enough. Part flee from the table and the remainder just fall back.
But still they try to close on the Billy Yank.
Who need the darned bales anyhow?
Having lost the Seminary the noose tightens on the Union troops and they surrender.

The game was hard-fought and murderous, with the Union reaching army-level heavy casualties after only 1.5 hours of play, the South by 2 hours, and the Union finally surrendering with honors after 2.5 hours - quite the bloody assault!

On the western flank, the Union was able to check the advance of McBride's "Hay Bale Bulwark" by concentrated fire from their most reliable infantry, numerous cannon, and the highly (okay, over-) effective fire of their 18lb Coehorn Mortars. Rives' small brigade was likewise stymied by concentrated crossfire as they approached the works in support. However, the Union concentration in the west had left the east thinly manned by regiments in extended line, and both salients occupied by small Missouri Reserve regiments of doubtful quality. These quickly folded under assaults by Parsons and Harris, and the Union regular cavalry was forced to retire within the works as Rains' brigade advanced. The battle was now fought in earnest over the grounds of the seminary, and several Confederate assaults were thrown back with bloody casualties. However, with both sides now teetering on the edge of morale failure, the Union flanks finally collapsed and the Cavalry and Missouri Reserve brigades routed, leaving the gallant Colonel Mulligan with no choice but to surrender the remainder of his garrison, now backed into the northwestern salient.

This was an unusual scenario, being a straightforward "Charge!" into the works, but it's always interesting to try and game a variety of situations. Under the "if I had to do it over again" heading, I think I would:

1. Okay, downgrade the Coehorns to FP4 with no special advantage against cover.
2. Make the Union works more "square" in shape, as the salients are simply indefensible, which is common to most rules.
3. I think I have to rethink my rating of breastworks. With things like occupying a woods line or a hill crest being +1 in close combat, I suppose "hasty works" would be +1 but actual breastworks should be +2, and able to be garrisoned so that they ignore Hard Pressed results. So... woods and hasty works are -1 cover versus fire and +1 in close combat, while breastworks are -2 cover and +2 in close combat, and ignore Hard Pressed. -3 cover versus fire is reserved for stone buildings, actual fortress walls, and so on.

Wikipedia entry of the battle

Janne (preface and afteraction report by Chris)
(Played: Mar 19th at Chateu d'Tenwolde. GM: Chris. Confederates: Bill, Janne, Mikko and Mr V. Union: Aksu and Chris.)

Force on Force -Lebanon 2006

IDF is supressing local insurgents while Hezbollah is preparing for ambush.

Some of the terrain.
DHL, Excellence. Simply Delivered -they really deliver everywhere...
Closeup on the bombed out school bus. Notice the dove of peace sitting on the remains.
IDF organizing their approach.
A couple of turns in. The Merkavas on the back have been ambushed (badly) by anti-tank missiles and in the front the only natives the IDF forces can see are the two protesting mobs.
Most of the natives consisted of local insurgents but there were also some proper Hezbollah troops present.
Amidst these suddenly drives a green pickup which stops at the crossroads.
And a couple of UN observers come of of the truck causing IDF to limit their firepower to hand weapons and tank machine guns.

In the end this didn't really matter that much as as there was no time limit and IDF could thus proceed wisely with extreme caution. So they pretty much annihilated all the natives suffering only like 2 wounded casualties as well as one scrapped tank which can be seen in the last pic.

Janne L
(Played: Mar 12th. GM: Janne N. Hezbollah: Aksu, Janne L. IDF: Chris, Mr. H, Mr V.)

lauantai 3. maaliskuuta 2012

WWII Aerial Game Test II


Did the second playtest with another set of rules, Scramble!

They seemed to work better than I recalled based on our first experiment with the rules. Actually with Scramble the game flowed better than with Sturmovik Commander which came to me as a surprise. Also the all important feel seemed to be a tad better. Here's the link to the Rules Update 1.4 PDF from which you can gleam some info on the system.

We managed to play two games with Scramble! and in the second one we tweaked the initiative system a bit so instead of having just one initiative for a side we generated initiative for each formation. This seemed to make the game more interesting and also somewhat more tilted in favor of better pilots.

In the first game we noticed that if a plane, like I-153, has a turn ratio of 1 (meaning after each 30 degree turn it must move 1 inch) it can really fly circles around those with turn ratios 2 (I-16) and especially ratio 3 (Brewster). You shouldn't get into dogfight with a more agile plane, even if it is piloted by a green pilot! You can make a pilot roll to turn 60 degrees but need to score less than your pilot skill on d10 or stall so you're doomed to stall sooner or later even if you're a good pilot. Most likely sooner...

Shooting distance, compared to plane scale was quite short, being 4 inches for machine guns. For comparison, a Brewster moves 12 inches in turn.

Also bomber gunnery seemed to be really quite effective with around 25-30% of shots hitting the target so it also goes against the gut feel. You REALLY don't won't to find yourself in the middle of a bomber formation with multiple gunners shooting at your fighter.

All in all a solid and enjoyable game and based on these two consecutive test games I'm inclined to say Scramble is the better one -not that Sturmovik Commander isn't a solid system mind you. There seemed to be somewhat more distinction between different aircraft and it played quicker. Naturally we already had some ideas we wanted to include to system but we must be careful not to go overboard with these as not to add too many bits to the system -especially when we don't have that many games under our belt with it. For example Mr V really likes the Avalon Hill's old Mustangs boardgame so some bits from it might get adapted.

A Brewster formation closing in on a Soviet blind.

I-16 is going down in flames, a Jak-1 is in dire straits and I-153 would be fine, if it wasn't shot to smithereens (one hitpoint from destruction).


Janne
(Played: Feb 27th. GM: Aksu. Finns: Mr V. Soviets: Aksu, Janne)

tiistai 21. helmikuuta 2012

WWII Aerial Game Test I


Years ago we hugely enjoyed playing WWI aerial combats with Canvas Eagles and even played a campaign for the whole war where one weekly game portrayed one week's activity -yeah the campaign lasted several years!

Since then we've kinda wanted to have similarly enjoyable games with WWII aerial combats and over the years have tried to locate a suitable system. I seem to recall Aksu having found a Canvas Eagles derivative from Rome (perhaps it was called "Fatto!") that we tried but it simply didn't work.

We currently have a couple of games that seem to work rather well but not everyone had played them so as Aksu wanted to give them a test we decided to play the same scenario with both Scramble and Sturmovik Commander.

Unfortunately Mr H who was most familiar with Sturmovik Commander didn't show up so the game took little bit longer than we expected and thus we didn't have time to check the Scramble too.

Our main interest is local combats so naturally the test game was between Finland and the Soviet Union, four SB-2 bombers escorted by two I-16 Ratas against two Brewsters and two Morane Saulnier 406s.


We used just the basic rules and while the system worked rather well, the fighters differed extremely little from one another. And I kinda felt that the system seemed to have worked better the previous time we played it. Anyways, it is basically impossible to beat the value for money the game has since it IS a good system and it doesn't cost a thing as you can download it from the above link for free.


Janne
(Played: Feb 13th. GM: Aksu. Finns: Eero, Janne. Soviets: Aksu, Chris, Mr V.)

sunnuntai 12. helmikuuta 2012

Battle of Belmont


Let's start with a couple of overviews of the table.


The Union advances a bit. Mostly through a swamp.

Confederates in their camp...

...is a ruse. Some of those regiments are actually in the cornfield hidden from the Union troops because of a small raise....

...so we have an ambush.

And using Wellingtonesque tactics, a charge goes nicely with an ambush.

With one section damaged the Union artillery limbers up and relocates quickly while their infantry gets into firing distance...

...routing one Confederate regiment while others just retreat.

Same situation. The new movement trays REALLY speeded up the game.

Union troops angrily chase the retreating Confederates...

...who move rather slowly but at least manage to rally the routing regiment.

Some fighting in the cornfield.

And some retreating.

The 2nd Union brigade gets into firing distance of the smaller part of Confederate camp.

First retreating regiment manages to get back into camp.

Union presses on towards the main camp and storms the smaller one in one sweep!

Confederate guns escape to the bigger camp while the infantry regiment tries, in vein, to repel the union troops. Also one unlucky regiment tries to find a way to get into the camp all the while being shot to pieces by Union troops.

Union gets their artillery back to front -this doesn't look good.

Trying to maneuver out of the artillery's firing arc.

Union regiments creep closer and open up.

Plenty of fire and smoke but little effect. Confederates had to this point of the game rolled at least eight "2's" while shooting. But this was soon to change to 8's, 9's and 10's.

half of the Confederate reinforcements arrive by ferry and start flanking the Union occupied part of the camp.

Since outnumbered and with little hope of overrunning the camp, Union decides to skedaddle.

Right Union brigade retreating in good order...

...while the left is still duking it out.

Confederates swiftly follow and engage and around this time Union got the heavier casualties marker.

The whole left Union brigade is routed and one regiment in the right one is pummeled into oblivion.

Confederates surge into close combat. The Union left brigade's regiment manages to win the melee even if it was routed and got the enemy into flank -go figure. On the Union right flank the already mauled regiment got beaten but the regiment next to it managed to give the Confederates a good trashing.


Thanks to Aksu, Janne, and Mr V for coming over yesterday and gaming the Battle of Belmont, Ulysses S. Grant's first outing as a Union general ... well, he might want to reconsider those future White House ambitions!

Grant's goal was to storm and burn Camp Johnston, which was being used to stage Confederate troops along the Mississippi. As the long Union march column approached the Confederate breastworks, it began to deploy along the road in preparation for the march through the swamp and forest towards the camp. This was a cautious approach (as opposed to continuing as far as possible along the road), but as the Union cavalry pickets discovered the Confederates had a surprise prepared. Hidden along a slight rise in a large cornfield, three regiments of CSA Tennessee Militia launched themselves onto the surprised Illinois Cavalry, which soon withered under the weight of numbers, and then drove off the Union artillery which had been approaching along the road.

This changed the Union plan, so that McClernand's main force began to march obliquely towards the cornfield while Dougherty's smaller supporting brigade deployed on the left and began to make its way towards the Confederate redoubt. The overzealous Confederates found themselves in a bit of a pickle, pinned to front and without room to maneuver. Fortunately for them ... I misremembered a rule and the pinned regiment was allowed to "voluntarily break away", starting the long process of the Confederate retreat towards the camp, which proved singularly uneventful in the face of some truly bad dice rolling. Things began to swing in the Union's favor as Dougherty's 7th Iowa stormed the Confederate redoubt protecting the flank of the main camp, routing the 2nd Tennessee and driving off the CSA artillery.

McClernand's regiments were also in position along the wood line to launch their assault on the main camp, just as Confederate morale began to falter under the weight of heavy casualties ... and then the Confederate reinforcements began to arrive! Brought in by steamer, two brigades of CSA infantry began to deploy on the flank of Dougherty's men, who were still jammed into the redoubt trying to redeploy. As one brigade pinned Dougherty's men, the other began to advance towards the Union landing point, and the entire Union army was ordered to break off the attack and retire. McClernand's men were able to do so in relatively good order, although they suffered heavy casualties as the newly invigorated Confederates left the camp to pursue them. Dougherty's men, however, caught between opposing forces and unable to redeploy, did some "voluntary breaking" of their own and streamed away in confusion.

As the Union was unable to storm the main camp, while the Confederates were able to inflict heavy casualties on the Union, the game was a solid win (3-0) for the CSA.

I was perhaps a bit heavy handed in making the Tennessee Militia somewhat too strong and resilient, and allowing the "ambush" to catch the Union so unprepared (and at close range), however the Union plan also unwittingly played into the Confederate strengths. Add to this some lucky rolls for reinforcements, and the game was actually much closer than it looks. Given another few turns, or a bit more historically brittle opposition, the Union could have stormed the camp. All in all, the game played fairly quickly and was certainly eventful!


Wikipedia entry of the battle

Janne (afteraction report by Chris)
(Played: Feb 6th at Chateu d'Tenwolde. GM: Chris. Confederates: Janne, Mr V. Union: Aksu, Chris.)